Remote access and distributed use
Control another Ai Keeper Mac, expose a guarded service to trusted devices, pair clients, connect nodes or agents, and separate traffic with explicit lanes.
Find one workflow
Filter this collection by name, outcome, provider, engine, channel, mode, or command.
Control a server Mac from Client mode
Use a lighter Mac as the interface while another Ai Keeper Mac owns models and engines.
Before you start
- A server Mac running Ai Keeper in Server mode.
- Its reachable management URL and management API key.
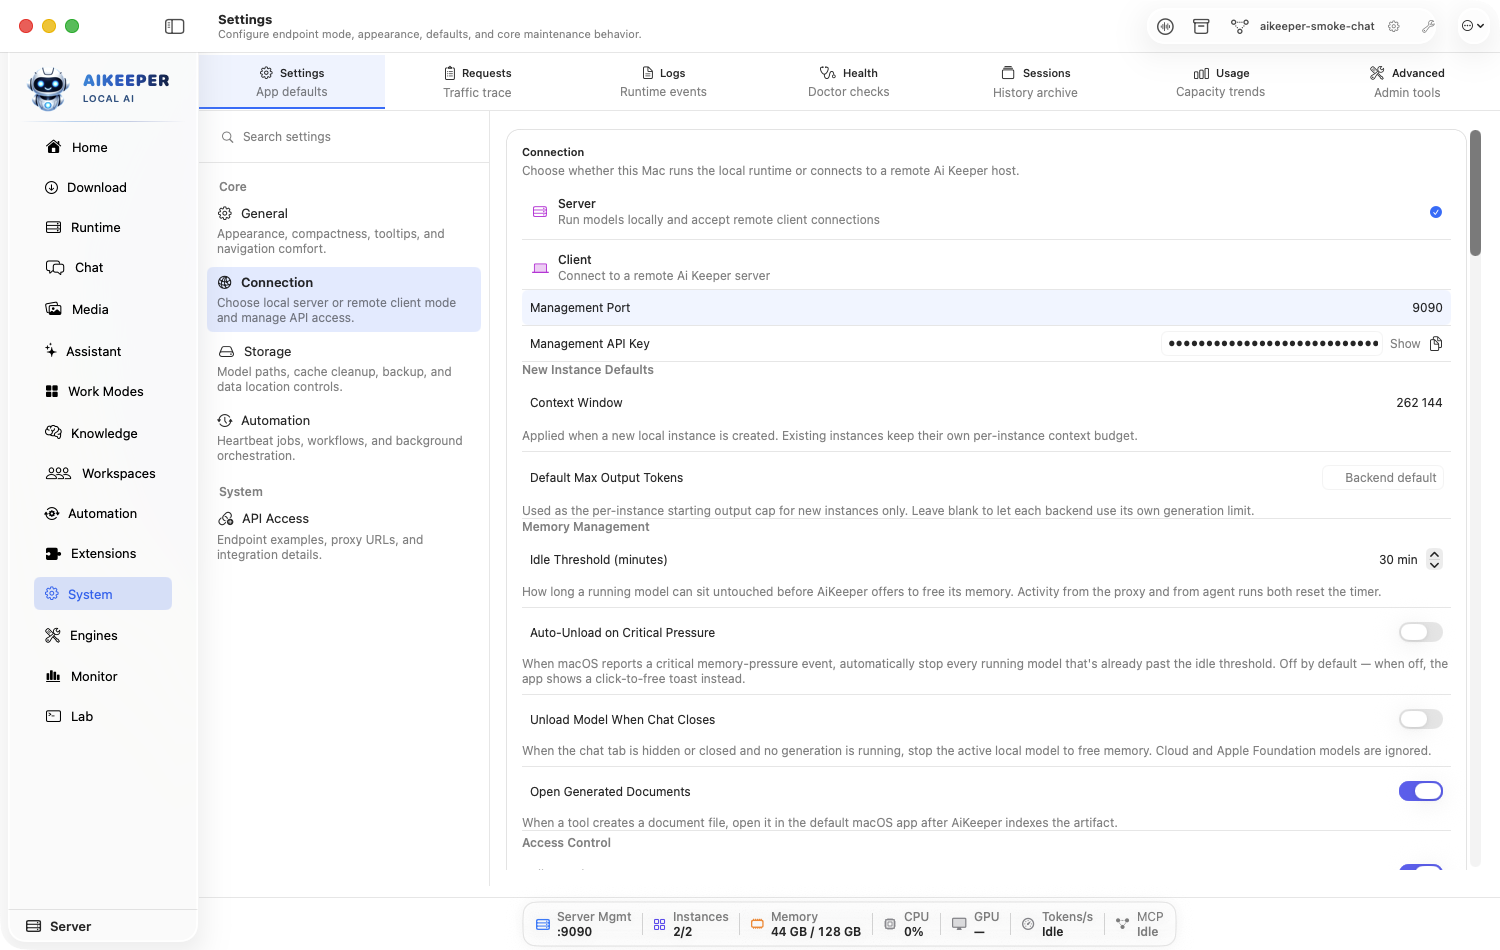
On the server Mac, open Settings > Connection, confirm Server mode, and copy the management connection details securely.
On the client Mac, choose Client mode and enter the server address and management key.
Save and wait for the Home connection status to become reachable.
Open Runtime and Chat from the client. Confirm local-only acquisition/engine surfaces are intentionally absent.
Send a harmless Chat request and inspect it on the server's Requests view.
You are done when
The client controls the remote Ready instance, and the server records the request; the client does not launch a duplicate local engine.Run a remote operation from Client Administration
Use the authenticated, certificate-pinned management catalog for host-owned features that are intentionally absent from Client mode.
Before you start
- Client mode connected to a trusted Ai Keeper Server.
- The remote operation and any required path/body values are understood.
Open Administration and reload the management catalog. If it is empty, fix Settings > Connection before editing an operation.
Choose the owning category—Models & Downloads, Engines & Dependencies, Extensions & Tools, Agents & Workspaces, Automation, Knowledge, Media, Operations, Configuration, or Observability & Security—or search by operation name.
Open a read-only operation first. Fill every path parameter exactly and run it; inspect the status and response body.
For a mutation, review the HTTP method and edit the JSON body carefully. Deliberately submit malformed JSON once in disposable data to confirm the UI reports a validation error instead of silently sending a different payload.
Run the corrected operation, then verify its effect in the matching native hub on the Server Mac. Test disconnect/reconnect recovery before relying on the client for administration.
You are done when
The read operation succeeds, invalid input is rejected visibly, and the corrected reviewed mutation is reflected on the Server without creating a local duplicate.Expose Ai Keeper to a trusted LAN safely
Move beyond loopback only after API authentication, management authentication, and firewall scope are ready.
Before you start
- A trusted private network.
- Strong API and management keys.
- Permission to change macOS firewall/network exposure.
Open Settings > Remote Access and review the current reachability profile.
Create/rotate strong keys for the proxy and management plane before changing any bind address.
Enable only the interfaces/ports required and keep LAN WebSocket authentication coupled to LAN exposure.
Restrict the macOS/router firewall to the trusted network or specific devices.
Find this Mac's LAN address. Use the address on your active interface — not
127.0.0.1, which is unreachable from anywhere else.en0is usually Wi-Fi anden1usually Ethernet. If both are empty, that interface is not connected.ipconfig getifaddr en0 || ipconfig getifaddr en1
shellFrom the other device, send one authenticated request against that address.
curl http://YOUR-MAC-LAN-IP:11434/v1/models \
  -H "Authorization: Bearer $AIKEEPER_API_KEY"
shellNow prove the door is actually locked. Send the same request with no credentials and confirm it is refused.
This is the step people skip. If this returns a model list instead of 401, anyone on the network can use your models — stop and fix authentication before going further.
curl -i http://YOUR-MAC-LAN-IP:11434/v1/models
shellRe-run Settings > Security Audit and confirm it does not report an exposed unauthenticated listener.
You are done when
The authorized device succeeds, unauthenticated access fails, and the Security Audit does not report an exposed unauthenticated listener.Pair a trusted device
Create an explicit trust relationship for an iPhone, iPad, or another Mac client.
Before you start
- Both devices are under your control and can communicate.
- You can compare/scan the pairing challenge in person.
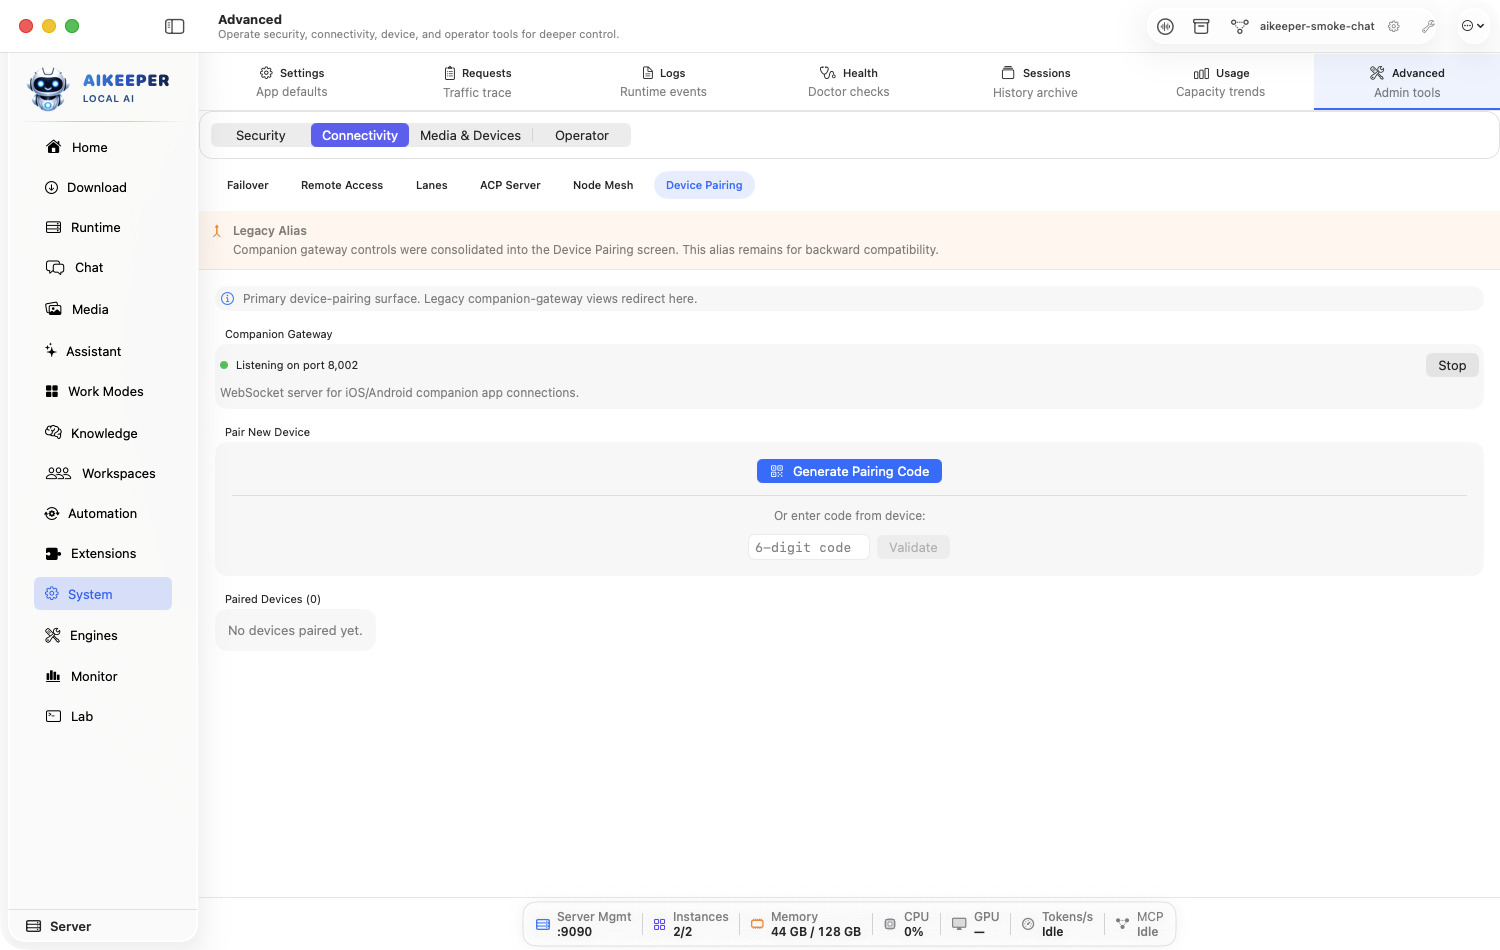
Open Settings > Device Pairing on the server Mac and start a new pairing.
On the other device, open its pairing flow and scan/enter the challenge.
Compare any displayed identity or confirmation code on both devices before accepting.
Name the device clearly and grant only the intended scope.
Test one permitted read-only action, then review the paired-device entry.
You are done when
Both devices report success, the server lists the expected identity/scope, and the read-only test works.Connect two Ai Keeper nodes
Discover and route work across trusted Macs while rejecting unsigned peers.
Before you start
- Two Ai Keeper server nodes on a trusted network.
- Distinct node names and trust material.
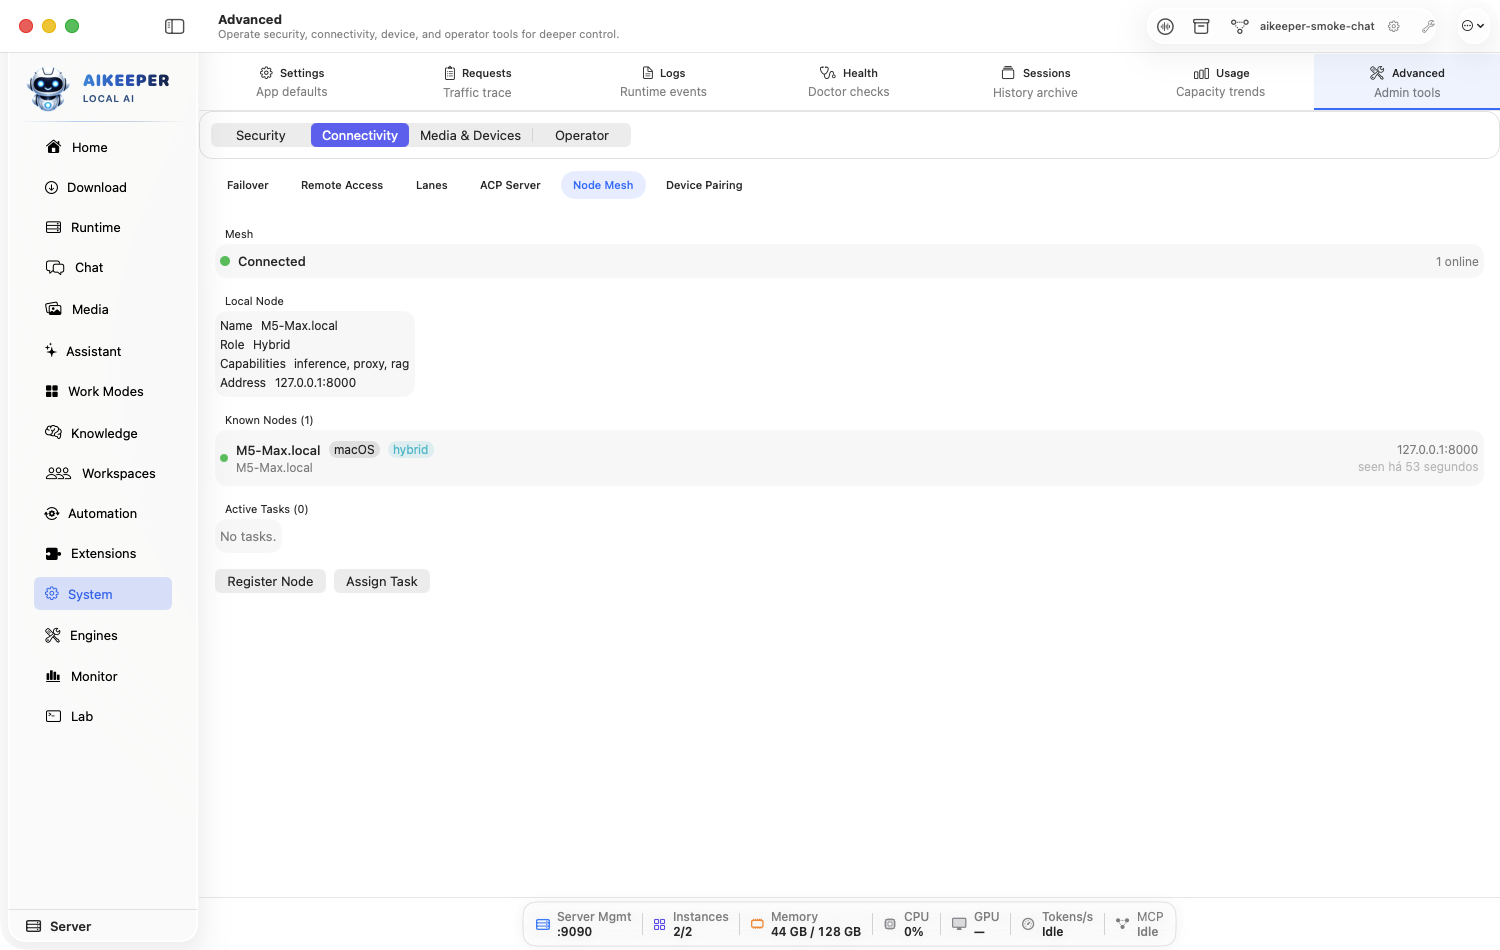
On each Mac, open Settings > Node Mesh and assign a clear unique node identity.
Exchange/approve trust material through the app's signed pairing flow. Do not accept an unsigned or unexpected peer.
Enable discovery or add the explicit peer address as appropriate for the network.
Wait for both nodes to show the other as reachable and authenticated.
Route one harmless test job to the remote node and inspect both audit trails.
You are done when
Both nodes show an authenticated peer, the test runs on the intended remote node, and an unsigned test peer is rejected.Enable and test ACP agent communication
Exchange structured agent messages separately from MCP tool calls.
Before you start
- A trusted ACP peer or client.
- A defined agent identity and allowed message scope.
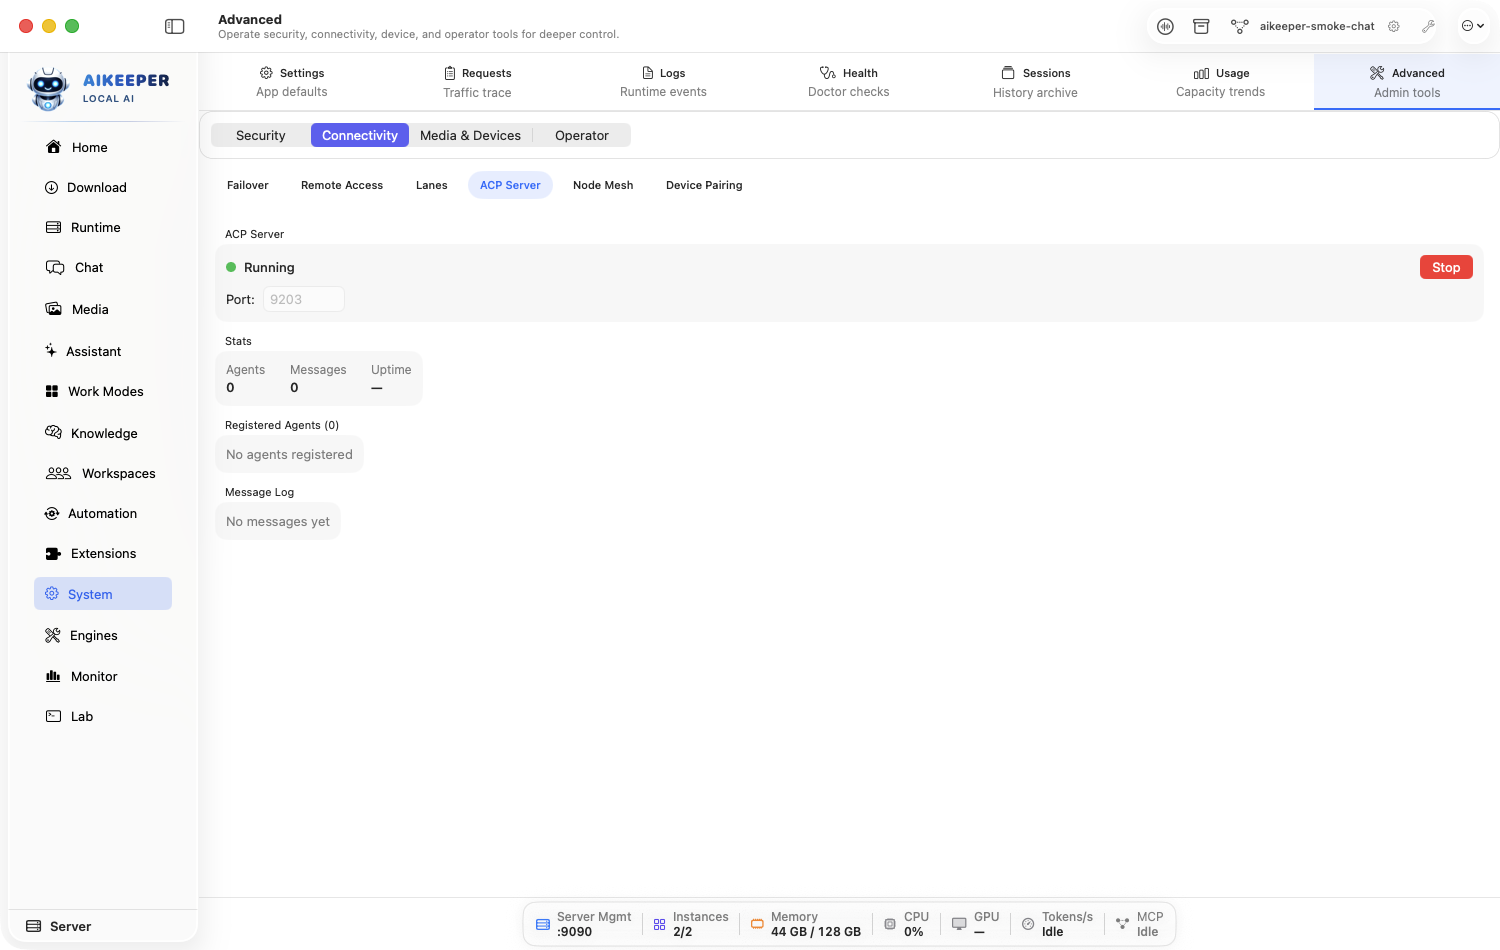
Open Settings > ACP Server and review bind/auth settings.
Keep it local or trusted-network only, configure authentication, and select which agents are reachable.
Start the ACP service and copy its connection details securely.
From the trusted peer, send one structured test message to an allowed agent.
Inspect response, session identity, and Audit Trail.
You are done when
The allowed agent receives and answers the structured message; an unknown agent or unauthenticated peer is rejected.Create a routing lane
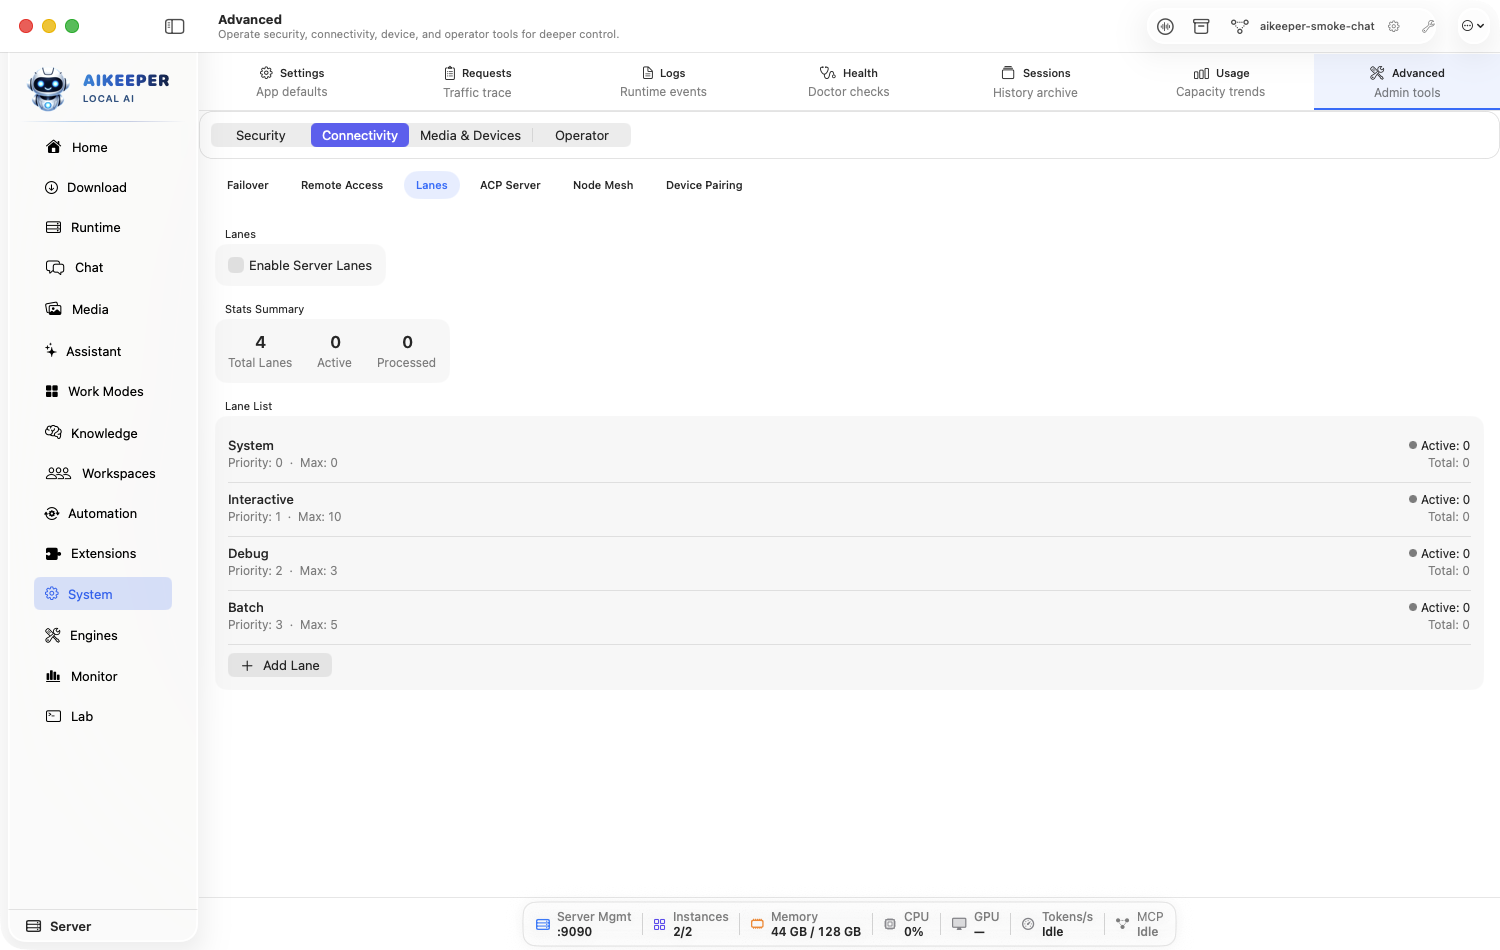
Separate traffic by purpose, priority, or tenant so important work does not share one undifferentiated queue.
Before you start
- A real need for traffic separation.
- Known route targets and priorities.
Open Settings > Lanes and create a lane named for purpose, such as interactive-chat or background-indexing.
Assign targets, priority/capacity, and matching rules. Keep a clear default lane.
Send one request that should match the new lane and one that should remain on default.
Inspect Requests and lane status to verify attribution.
Document the matching rule before adding more lanes.
You are done when
Each test request appears in the expected lane and no route is stranded without a default.Reach your Mac from anywhere over Tailscale
Use a private mesh network instead of opening a port on your router, and understand exactly what each button exposes.
Before you start
- Tailscale installed and signed in on this Mac and on the remote device.
- API-key protection already enabled — see Expose Ai Keeper to a trusted LAN safely.
- The proxy port from Settings > API Access. The default is 11434.
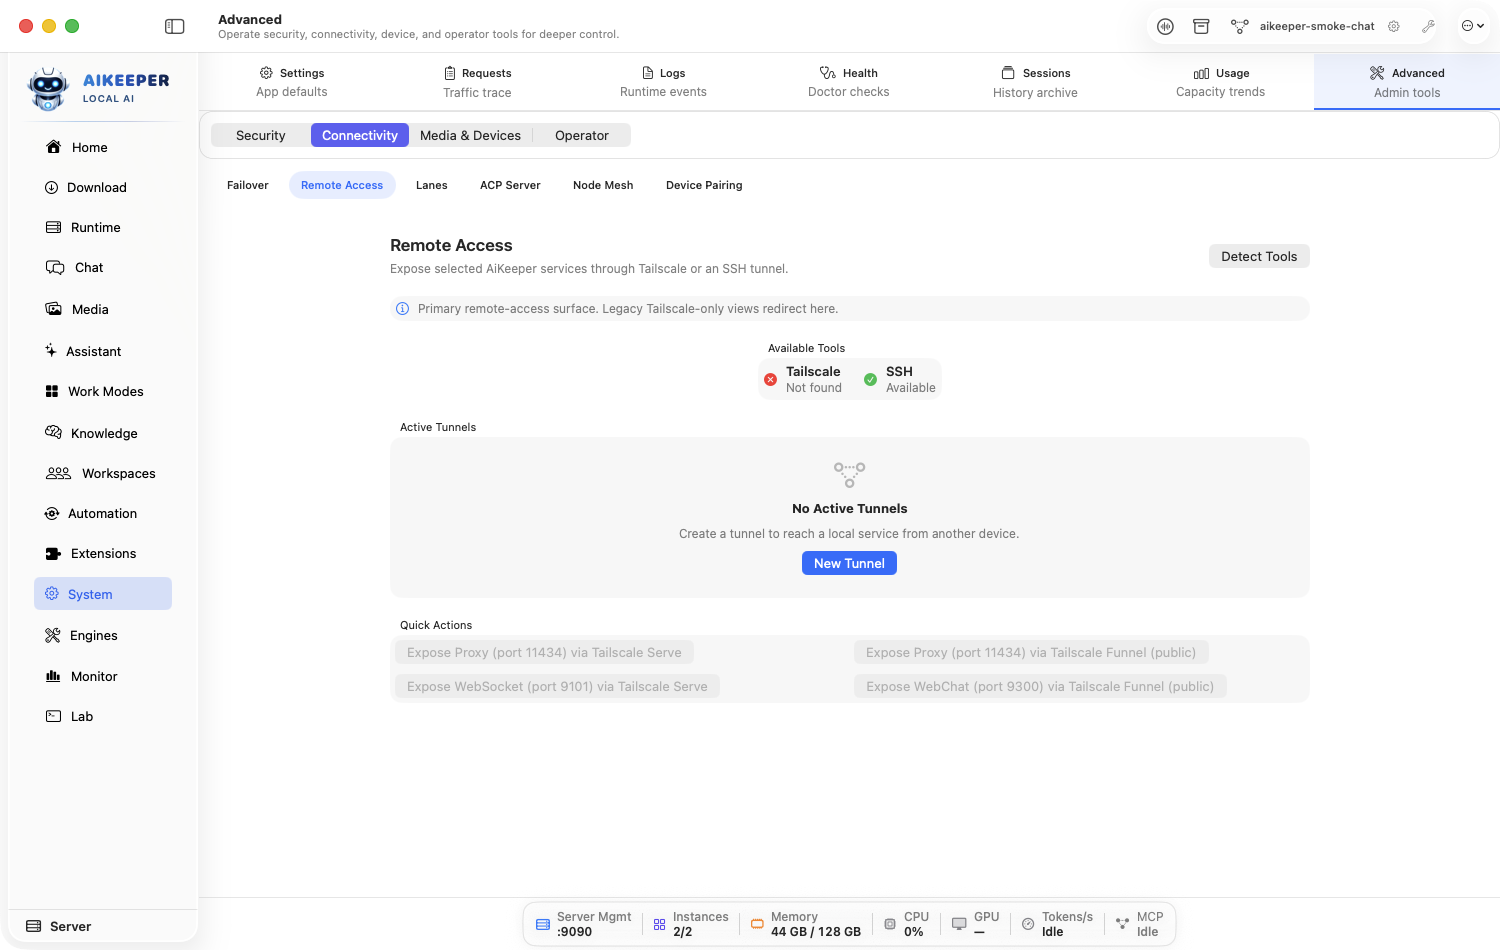
Open Settings > Remote Access. If the Tailscale buttons are greyed out, Tailscale is not detected — install and sign in first, then return.
Understand the two modes before clicking. Tailscale Serve exposes the app within your tailnet — only your own devices. Tailscale Funnel exposes it publicly over the internet.
Funnel is a public endpoint. Never start it without API-key protection already proven, and prefer Serve unless you genuinely need access from a device that cannot join your tailnet.
Check which port the quick actions target. The buttons read Expose Proxy (port 8000) via Tailscale Serve and the Funnel equivalent — that 8000 is fixed in the button and does not follow your configured proxy port.
If your proxy is on the default 11434, these quick actions will not expose it. Use New Tunnel and set Local Port to your real proxy port instead.
Create the tunnel explicitly: New Tunnel, set Local Port to your proxy port, then Create. Confirm it appears under Active Tunnels rather than No active tunnels.
From the remote device, request the model list against the tailnet hostname. Do this before configuring any app.
curl https://YOUR-MACHINE.YOUR-TAILNET.ts.net/v1/models \
  -H "Authorization: Bearer $AIKEEPER_API_KEY"
shellProve the lock holds. Repeat without credentials and confirm the request is refused.
With Funnel this is not optional — an unauthenticated public endpoint serving your models is the worst outcome available in this app.
curl -i https://YOUR-MACHINE.YOUR-TAILNET.ts.net/v1/models
shellUse Stop Serve, Stop Funnel, or Stop All Tunnels when you are finished. Leave nothing exposed that you are not actively using.
You are done when
The authenticated request from the remote device returns the model list, the unauthenticated one is refused, and Active Tunnels lists only tunnels you meant to create.Revoke access and rotate keys
Take access away from a device, a person, or a leaked key — and confirm it is actually gone rather than assuming.
Before you start
- Access to this Mac.
- A list of what you have handed out: API keys, the management key, paired devices, tunnels, channel tokens.
Decide the blast radius first. Losing a laptop means revoking everything it held; retiring one script means rotating one key. Write the list down before you start clicking.
Partial revocation is the common failure. A rotated proxy key means nothing if a paired device or an open Funnel still works.
Open Settings > Device Pairing and use Remove paired device for anything you no longer recognise or need. No devices paired yet. is the safe resting state.
Open Settings > Remote Access and use Stop All Tunnels. A revoked key does not close a tunnel you left running.
Rotate the proxy API key and the management key in Settings > API Access and Settings > Connection. Store the new values in Settings > Secrets, not in a note.
Rotate any channel tokens and webhook secrets you issued — those are separate credentials that key rotation does not touch. See the channel and webhook walkthroughs.
Verify with the old credential, not the new one. It must now be refused.
Testing the new key only proves the new key works. Testing the old one proves the revocation happened.
curl -i http://127.0.0.1:11434/v1/models \
  -H "Authorization: Bearer THE-OLD-KEY"
shellRe-point the clients you still want working, one at a time, and confirm each in Activity > Requests.
Finish in Settings > Audit Trail and read what the revoked party did while they had access.